Friday, September 25, 2009

Adult Surprise Jacket, almost done


I've been knitting a classic Elizabeth Zimmerman pattern called the adult surprise jacket for the last few months. I made a baby surprise jacket (known on the internet as BSJ) years ago for my nephew, but I had sort of forgotten how strange and ingenious the design is. EZ somehow figured out how to make a jacket in one piece out of garter stitch. The shaping relies on strategically placed decreases and increases. You start knitting at the top back, and your decreases cause the ends to turn until they form a ninety degree angle with the back, at which point they begin to resemble sleeves. You just have to follow the directions and have faith.

EZ describes the way she "unvented" the first baby surprise jacket: she was just sort of mindlessly knitting along on a square of garter stitch, making some decreases. At one point in frustration she threw her piece of knitting against the wall. It fell on the floor and miraculously, it folded itself in such a way as to suggest said sleeves. "Aha!" she thought, "A baby jacket!" The original baby jacket pattern, first knitted for EZ's grandson Cully, was printed in her newsletter in 1968. It has become a very popular, even classic, pattern, and there are groups on the internet devoted to discussing the knitting of it.

The thing that's so cool about this pattern is the way it uses up odd bits of yarn while you knit the stripes, in a totally spontaneous process that results in something very planned-looking. The symmetry happens on its own because of the fact that it's knit in one big piece. But it looks as if you labored mightily to make the sleeves and fronts symmetrically striped. Also, the way the decreases and increases miraculously turn and shape the garment is fascinating. EZ was a genius. (Well, everybody knows that.)

The new BSJ pattern from Schoolhouse Press includes an adult version (the one I'm knitting) and a child version. For the adult and child versions, you lengthen the elbow-length sleeves by knitting up from the bottom of the cast-on edge of the sleeves.

I'm at the part where you knit up the button band around the front. (The button band also travels around the back bottom edge of the jacket.) You make an ingenious one-row buttonhole by casting off four stitches, and then making four backward loops on your needle. When you come back on the next row, you knit up those four loops, and there's your button hole.


I am using some cotton yarn in a worsted weight that I've had for almost fifteen years in my stash. I bought it from Webs years ago, back when they sent out yarn samples once a month. I was going to use this thick yarn as weft for placemats, but I never made the placemats.

When we were on our road trip this summer, we went to Northampton, MA. Webs is there! It turned out to be within a few blocks of my son's apartment. So one day I walked down there with the old yarn to try to match it and get a little extra. They didn't have that exact yarn, but they had something nicer that was very close in weight and color. It was fun to actually see the gigantic Webs warehouse of yarn, which had acquired a sort of mythical stature for me over the years when I was a professional weaver.

Saturday, September 5, 2009

Sewing Orgy: Pieced tee shirt

Sometimes right before I go back to Houston to work, I indulge in a two or three day sewing orgy. This is not something that I plan; it just happens. I make a whole lot of clothes in a few days.

Yesterday I finished a vest; today I made a tee shirt. I had a lot of scraps of knits left over from other tee shirt projects. Some of these tees that I made last year didn't work out too well: they were too tight under the arms mainly. (It was a surplice tee pattern, and those are more fitted so that your boobs won't jump out.) The fabric was cotton knit that I had bought plain white from Dharma Trading and dyed. Also I did some bleach discharge and fabric paint stamping on it.

To make the shirt, I used a Kwik Sew tee shirt pattern from a Kwik Sew book. It's called Easy Sewing the Kwik Sew Way, and it's the first edition, not the second. The tees in the first edition are the boxy, eighties style tees that I like because they are so comfortable.

I altered the pattern a bit by narrowing the shoulders and shortening the sleeves, as I always do for every pattern.

Then I used a technique I had learned from making a Marcy Tilton pattern. In one of her tee shirt patterns, the front is pieced from two pieces of knit fabric zigzagged together in a sort of curve down the front of the shirt. The same is true of the back. You just overlap the pieces and zigzag the overlap, leaving a raw edge. It looks great and it doesn't ravel. Hurray for knits!

I had a lot of small pieces of fabric, none big enough to cut half of one side of the front or back, so I pieced smaller pieces together until I had a piece big enough to cut out one side of the front. I cut it so that there was about three inches extra of fabric added in the center of the shirt. Then I did the same to make the other side of the front. Then I overlapped the two pieces, drew a curvy line down the center, and zigzagged that line. Then I cut away the extra fabric outside the lines. I may not be explaining that very well, but here's a picture:


You can sort of see the chalk line where I marked the center front, in order to line it up with the other center front. You can also see that I left some fabric outside that center front line, to overlap the other piece.

HEre's the back:


The tee shirt is as comfortable as I had hoped it would be.

Those surplice tees that I took apart to make this tee were flattering, but not comfortable, and I was always worried that when I leaned over, a boob would hop out or be visible. Not good at work.

I think this piecing technique would work for my favorite tank top pattern too. I still have a lot of knit scraps yet, but I'm not sure I have time to make any more clothes before I leave tomorrow.

Marcy Tilton vest, Vogue 8399


I just finished making what for me was a pretty hard pattern, Vogue 8399, designed by Marcy Tilton. I've made a lot of Marcy Tilton designs in the last year or so. Mostly, I really like them. I wore them almost exclusively last fall and spring to work.

This pattern, though, was frustrating and difficult. I was making the vest version, from a cotton linen blend I got very inexpensively at Hancock's. This version was sort of my muslin.

The first thing that was hard was that you were supposed to take some silk organza and pleat it so that you created a kind of new piece of fabric from which you cut out that back piece that you see in the picture above. I didn't have any organza so I used some very fine, transparent silk. The folding and pleating was difficult because the silk was so slippery. Also, by the time I finished doing all the folding, pleating and stitching down of pleats, the piece was almost too small to cut out the godet!

Also, you were supposed to bind the back seam with home-made bias tape, a Hong Kong finish. This looked good, but when you sewed in the godet, it covers up the beautiful Hong Kong finish! This didn't make sense to me. I would rather have sewed the godet to the back seams and then added the seam binding, to cover the messy edge of the godet. But, instead I just turned under the edges of the godet and tacked them down.

The next major frustration was the fact that the shoulder seams were drafted incorrectly! I first got an inkling of this when I read a review of the pattern on Sewing.patternreview.com. There was only one review, but this reviewer noticed that the shoulder seam is drafted so that the "flanges"--the darts on the outside of the vest--are drafted as if they were to be folded toward the shoulder rather than toward the armhole. You are directed to fold them toward the armhole. I found out that she was right. It's hard to describe this problem without showing you a before and after shot, but suffice it to say, I had to unpick the shoulder seam and dart, redraw the shoulder seam , recut the shoulder seam, and resew the shoulder seam so that the flange wouldn't stick up in the air at the shoulders. That looked ridiculous when I did it the way the pattern was drafted.

I am ambivalent about the flanges generally. I may eliminate them if I make this pattern again.

I liked the way the neckline rises up to cover the back of your neck. It was a little difficult to sew the back to the front extensions which became this neckline, but it was worth it.


I liked the way the front was designed. You see two different contrasting fabrics in front, one where the facing shows a bit around the neck, and one where the front bands contrast with the front fabric.


The neckline feels good, like the way my fleece jacket has that high collar around the back of my neck.

Also the pockets are fine.

I wish I had used a slightly heavier fabric. This one feels a little too light, not quite stiff enough. The pattern has a vaguely Asian feel to it. Maybe an ikat cotton would be a good choice for the next iteration. Or a handwoven cotton-linen fabric.

Wednesday, September 2, 2009

Ottilia dress


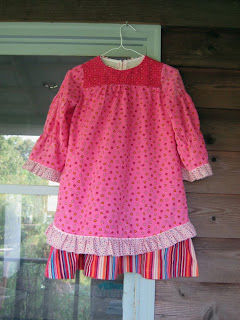
I finished the Ottilia dress today from Ottobre Winter 2007. I think it's pretty cute.